
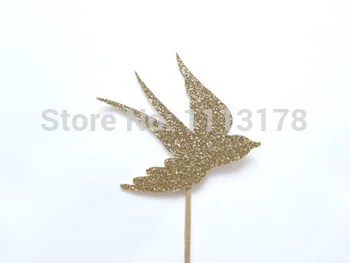
Блестящее внешнее пространство инопланетяне День рождения кекс топперы Свадьба
1 256,58 руб.

Сохраните в закладки:


*История изменения цены! Указанная стоимость возможно, уже изменилось. Проверить текущую цену - >
| Месяц | Минимальная цена | Макс. стоимость | Цена |
|---|---|---|---|
| Mar-21-2026 | 0.88 руб. | 0.51 руб. | 0 руб. |
| Feb-21-2026 | 0.51 руб. | 0.3 руб. | 0 руб. |
| Jan-21-2026 | 0.67 руб. | 0.25 руб. | 0 руб. |
| Dec-21-2025 | 0.70 руб. | 0.70 руб. | 0 руб. |
| Nov-21-2025 | 0.59 руб. | 0.99 руб. | 0 руб. |
| Oct-21-2025 | 0.32 руб. | 0.74 руб. | 0 руб. |
| Sep-21-2025 | 0.12 руб. | 0.32 руб. | 0 руб. |
| Aug-21-2025 | 0.79 руб. | 0.58 руб. | 0 руб. |
| Jul-21-2025 | 0.74 руб. | 0.51 руб. | 0 руб. |
Новые товары
Характеристики
Описание товара
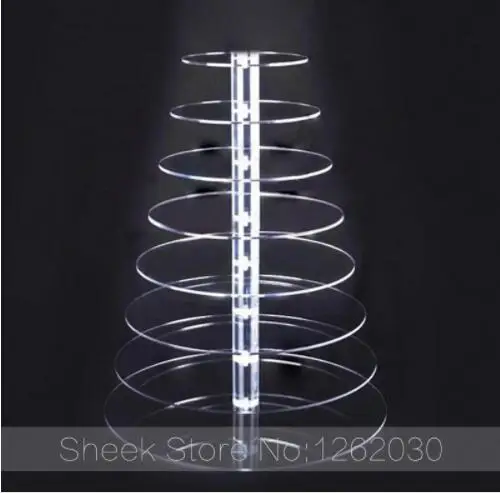
Free Shiping 8 Tier Crystal Acrylic Round Cupcake Stand or perspex cake Display Tools Suitable for Christmas/Wedding/Birthday


7Tier Acrylic Cupcake Display
There is no need for glue or other fixings.
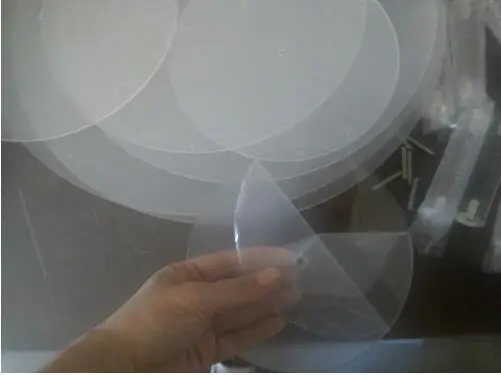
The edges of the acrylic are perfectly clear and polished. Every part of the stand has been accurately cut and finished.
Can be taken apart, washed and stored away for another time.
The stand comes flat packed and only takes a few minutes to assemble.
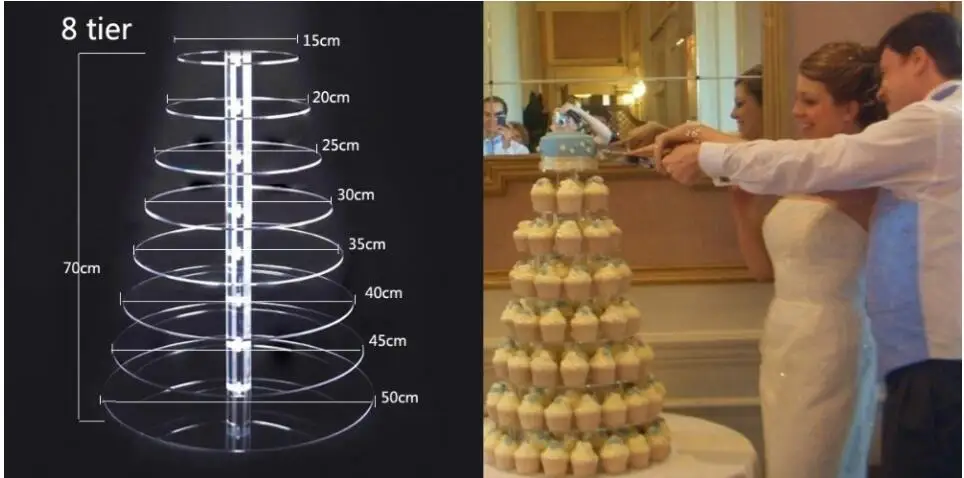
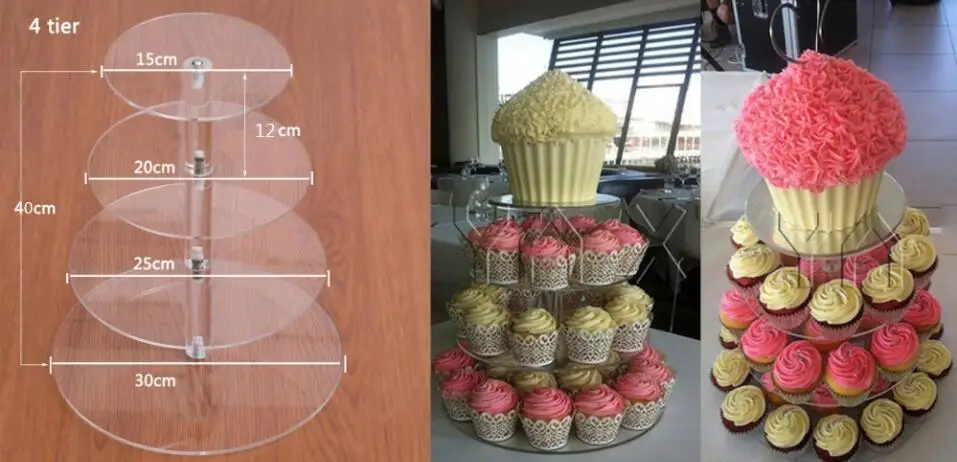
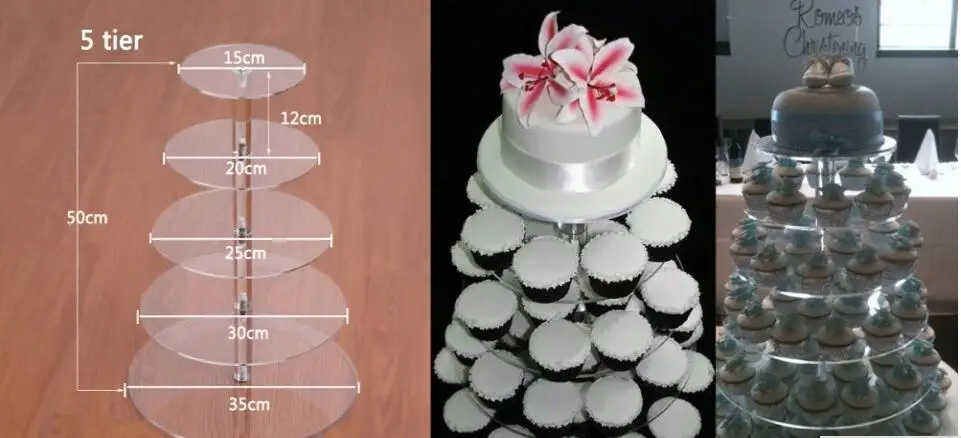
The entire size: Length 450 * Width 450 * Height 631mm
Rod Size : Diameter 30mm(1.18") x Height 100mm(4")
Plate Size: tier 1:150x150mm / 6"
tier 2:200x200mm / 8"x8"
tier 3:250x250mm / 10"x10"
tier 4:300x300mm / 12"x12"
tier 5:350x350mm / 14"x14"
tier 6:400x400mm / 16"x16"
tier 7:450x450mm / 18"x18"
Contents: Tier plates x7 ; Rod pillars x 6; Screws x 7 Ideal for weddings, parties, kids birthday parties, christenings, etc.
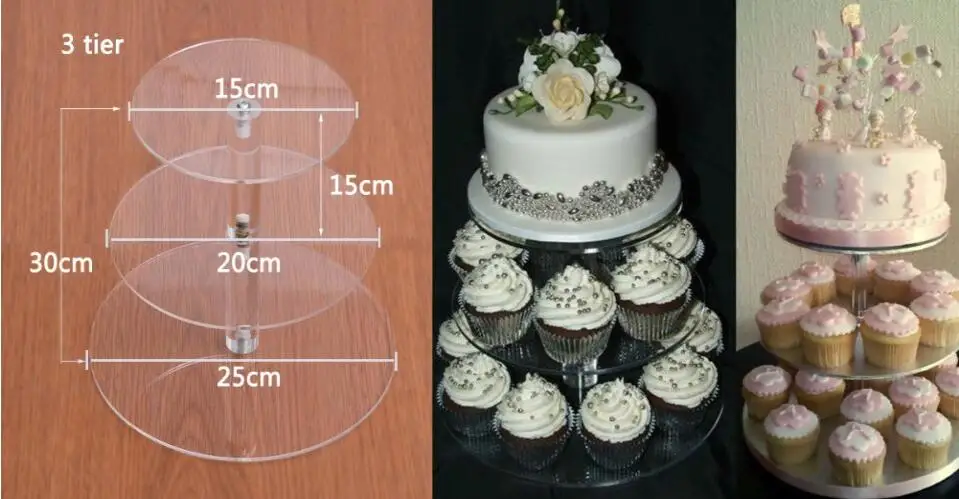
Below you will find an example of how many cupcakes can be arranged on each tier.

CARE GUIDE:
* The stand is made from acrylic which will scratch if it is not looked after properly.
* To clean the product use warm water with a little washing-up liquid and soft cloth.
* Do not use any abrasive cleaning products as they will make the acrylic.
* Do not put the stand in a dishwater
ASSEMBLY GUIDE:
Parts: Acrylic discs, head screws, double screws, acrylic rods and acrylic feet.
* Remove the manufacturer\'s protective cover from BOTH side of each acrylic component.
* Begin by placing the feet to the underside of the bottom disc ensuring they are evenly spaced.
* Take a metal head screw and place it on to a flat surface where the stand is to be constructed
* Carefully line up the hole(s) of the largest disk with head screw ensuring the disc is resting securely on the acrylic feet.
* Now screw the first rod onto the screw thread of the head screw making sure the acrylic disc is clamped firmly between two components.
* Continue by placing the next largest disc on to the screw thread of rod and tighten each piece as you go.
* The final rod is to be used as the supposed for the top tier and the stand is completed by adding the other screw cap into the top.

Step One:

Step Two:

Step Three:

PACKING DETAILS:
Package: Elastic film+ air bag + outer ctn


Any further details,please feel free to contact us,your inquiry will be replied in 24 hours.
Any further details,please feel free to contact us,your inquiry will be replied in 24 hours.
CARE GUIDE:
* The stand is made from acrylic which will scratch if it is not looked after properly.
* To clean the product use warm water with a little washing-up liquid and soft cloth.
* Do not use any abrasive cleaning products as they will make the acrylic.
* Do not put the stand in a dishwater
CARE GUIDE:
* The stand is made from acrylic which will scratch if it is not looked after properly.
* To clean the product use warm water with a little washing-up liquid and soft cloth.
* Do not use any abrasive cleaning products as they will make the acrylic.
* Do not put the stand in a dishwater
ASSEMBLY GUIDE:
Parts: Acrylic discs, head screws, double screws, acrylic rods and acrylic feet.
* Remove the manufacturers protective cover from BOTH side of each acrylic component.
* Begin by placing the feet to the underside of the bottom disc ensuring they are evenly spaced.
* Take a metal head screw and place it on to a flat surface where the stand is to be constructed
* Carefully line up the hole(s) of the largest disk with head screw ensuring the disc is resting securely on the acrylic feet.
* Now screw the first rod onto the screw thread of the head screw making sure the acrylic disc is clamped firmly between two components.
* Continue by placing the next largest disc on to the screw thread of rod and tighten each piece as you go.
* The final rod is to be used as the supposed for the top tier and the stand is completed by adding the other screw cap into the top.
PACKING DETAILS:
Thickness: 4mm
Material: Acrylic (PMMA)


Часто покупаю трикотажные комплекты. Подходит для любых размеров, в них очень удобно и комфортно. Люблю особенно бежевые цвета, и этот... Читать отзыв полностью...

Чемодан очень вместительный, качество очень хорошее. Поражает - очень легкий вес для такого объема, что для меня было очень... Читать отзыв полностью...

Заказывала футболку чёрного цвета с современным дизайном. Приятно прилегает к телу, сильно не мнется. Цвет после стирки остался прежним, что... Читать отзыв полностью...

Заказывала платье S размера. Подошло отлично, так как перед заказом лучше всего измерять свои параметры. Доставка была быстрой, без... Читать отзыв полностью...
Покупала красный кошелек на подарок. Очень понравился. Помещаются купюры любого достоинства. Достаточно отделений для карточек, можно вставлять даже две карточки... Читать отзыв полностью...
Супер классный, удивительно красивый, а главное качественный и удобный сдельный купальник. Высокая линия бедер этого слитного купальника черного цвета зрительно... Читать отзыв полностью...


Красивенькая кофточка. Одеваю её поверх майки. Выглядит очень женственно и элегантно. Материал приятный к телу, лёгкий. Скрывает небольшие недостатки благодаря... Читать отзыв полностью...